WA2IAC Arrow Satellite Antenna | See also: Home Antennae 2011 Gear |

|

Left, a view of the antenna. The grip and duplexer were removed in order to mount the antenna on the tripod for display. A threaded hole is provided for tripod mounting, above, however it's virtually useless because the load on the tripod is unbalanced. The YL touched the antenna after the photo was taken, and it immediately toppled. The antenna works great hand-held, but for tripod use (which could be convenient for both satellite and non-satellite use) an extention of the boom would be necessary (which would also block the threaded hole provided). YouTube has many videos showing solutions to this problem. Click on images to see larger versions. |
I shot an arrow in the air...
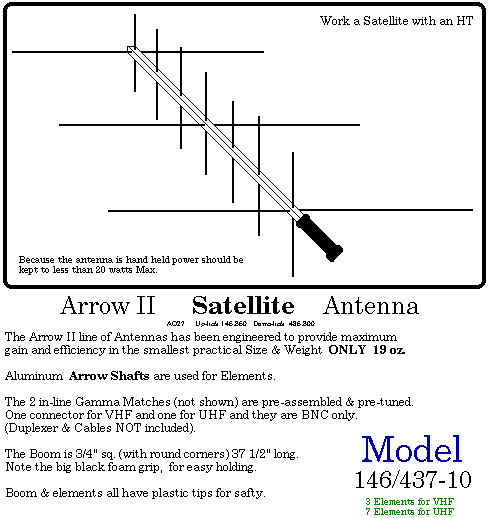
(February, 2011) When this Arrowantenna started to appear in the ham publications, I had to get one. It helped that I was on a major acquisition spree at the time. For me, that was back around 2000. The idea of being able to work satellites with an HT while pedestrian mobile was just too enticing to fail to experience. I've worked QSOs via several satellites with this antenna and either the Yaesu VX7R hand held, the VX2R HT, or the FT817 QRP rig. I've worked the space station. In the past years during which my life was disrupted (2001-2010) I had no time to work satellites, but I did use the antenna setup as a hand-held Yagi antenna to make contacts that wouldn't have been possible with a regular whip antenna. I've even worked other stations doing the same! So don't be afraid to use this antenna simply as a hand-held yagi. It's particularly awesome on 70cm with its 7 elements, of course.
This web article is primarily about my documentation of what I have and what I'm doing with it. I'll expand this article to show some actual operation as time permits. The videos I'm seeing on YouTube seem to be over-complicating it a bit, so perhaps I have something to add to the dialogue. I'd also like to point out that although the Arrow was the first, there is a newer, and possibly better, contender (I haven't tried one yet) made by Elk Antennas. There appear to be three two main differences: (1) log periodic design resulting in smaller size and broader bandwidth, and (2) a plastic boom/handle. The gain is slightly less, particularly on 70cm, however, other factors could make this a better antenna; especially for hand-held use.
YouTube videos, hardly the best source for information but easiily accessible and entertaining, show many ops avoiding hand-held operation and going for a tripod mount. To them, I say, whussies! There's nothing better than working a satellite with the antenna in one hand and the HT in the other (especially when it's as small as the VX2R). But it does require some physical coordination, and perhaps that's the issue.
Sources of Satellite Data
If you want to play with one of these things, you'll want to become familiar with "Heavens Above" at http://www.heavens-above.com, the one I use, or another source of information about when a satellite will become reachable. They're all LEO (Low Earth Orbit), so the satellites come whizzing over your part of the planet pretty fast, and then they're gone till the next time they come back to your neck of the woods. The satellites I've worked typically came within working range twice a day.
How it Works
In short, working satellites pedestrian mobile with the Arrow antenna involves:
- Preparation: know when and where and for how long the satellite will appear
- Programming: have doppler shift frequencies programmed in your radio
- Stand and Wait: when the satellite pops up over the horizon, move the antenna for best reception, and then transmit. Cycle through the doppler frequencies as you trace the arc of the satellite, and try to make contact!
- Recover: afterward, your arm will be tired, and you'll be physically frustrated from the coordination of the antenna with one hand, and the radio and logbook with the other.
- Remind yourself it's fun: This is awesomely fun!
![]()
![]()
Comes in a Bag
The Arrow antenna comes in a bag. I'll add a picture the next time I put it back in the bag, which could be a real long time.
I generally keep the antenna with the 70cm elements installed. Readying the antenna then involves only attaching the 3 two meter elements, connecting the duplexer, connecting the radio, and firing up the radio. It's a real good idea to have the frequencies pre-programmed and ready-to-go, or you'll miss the pass!
 Sign of the Time
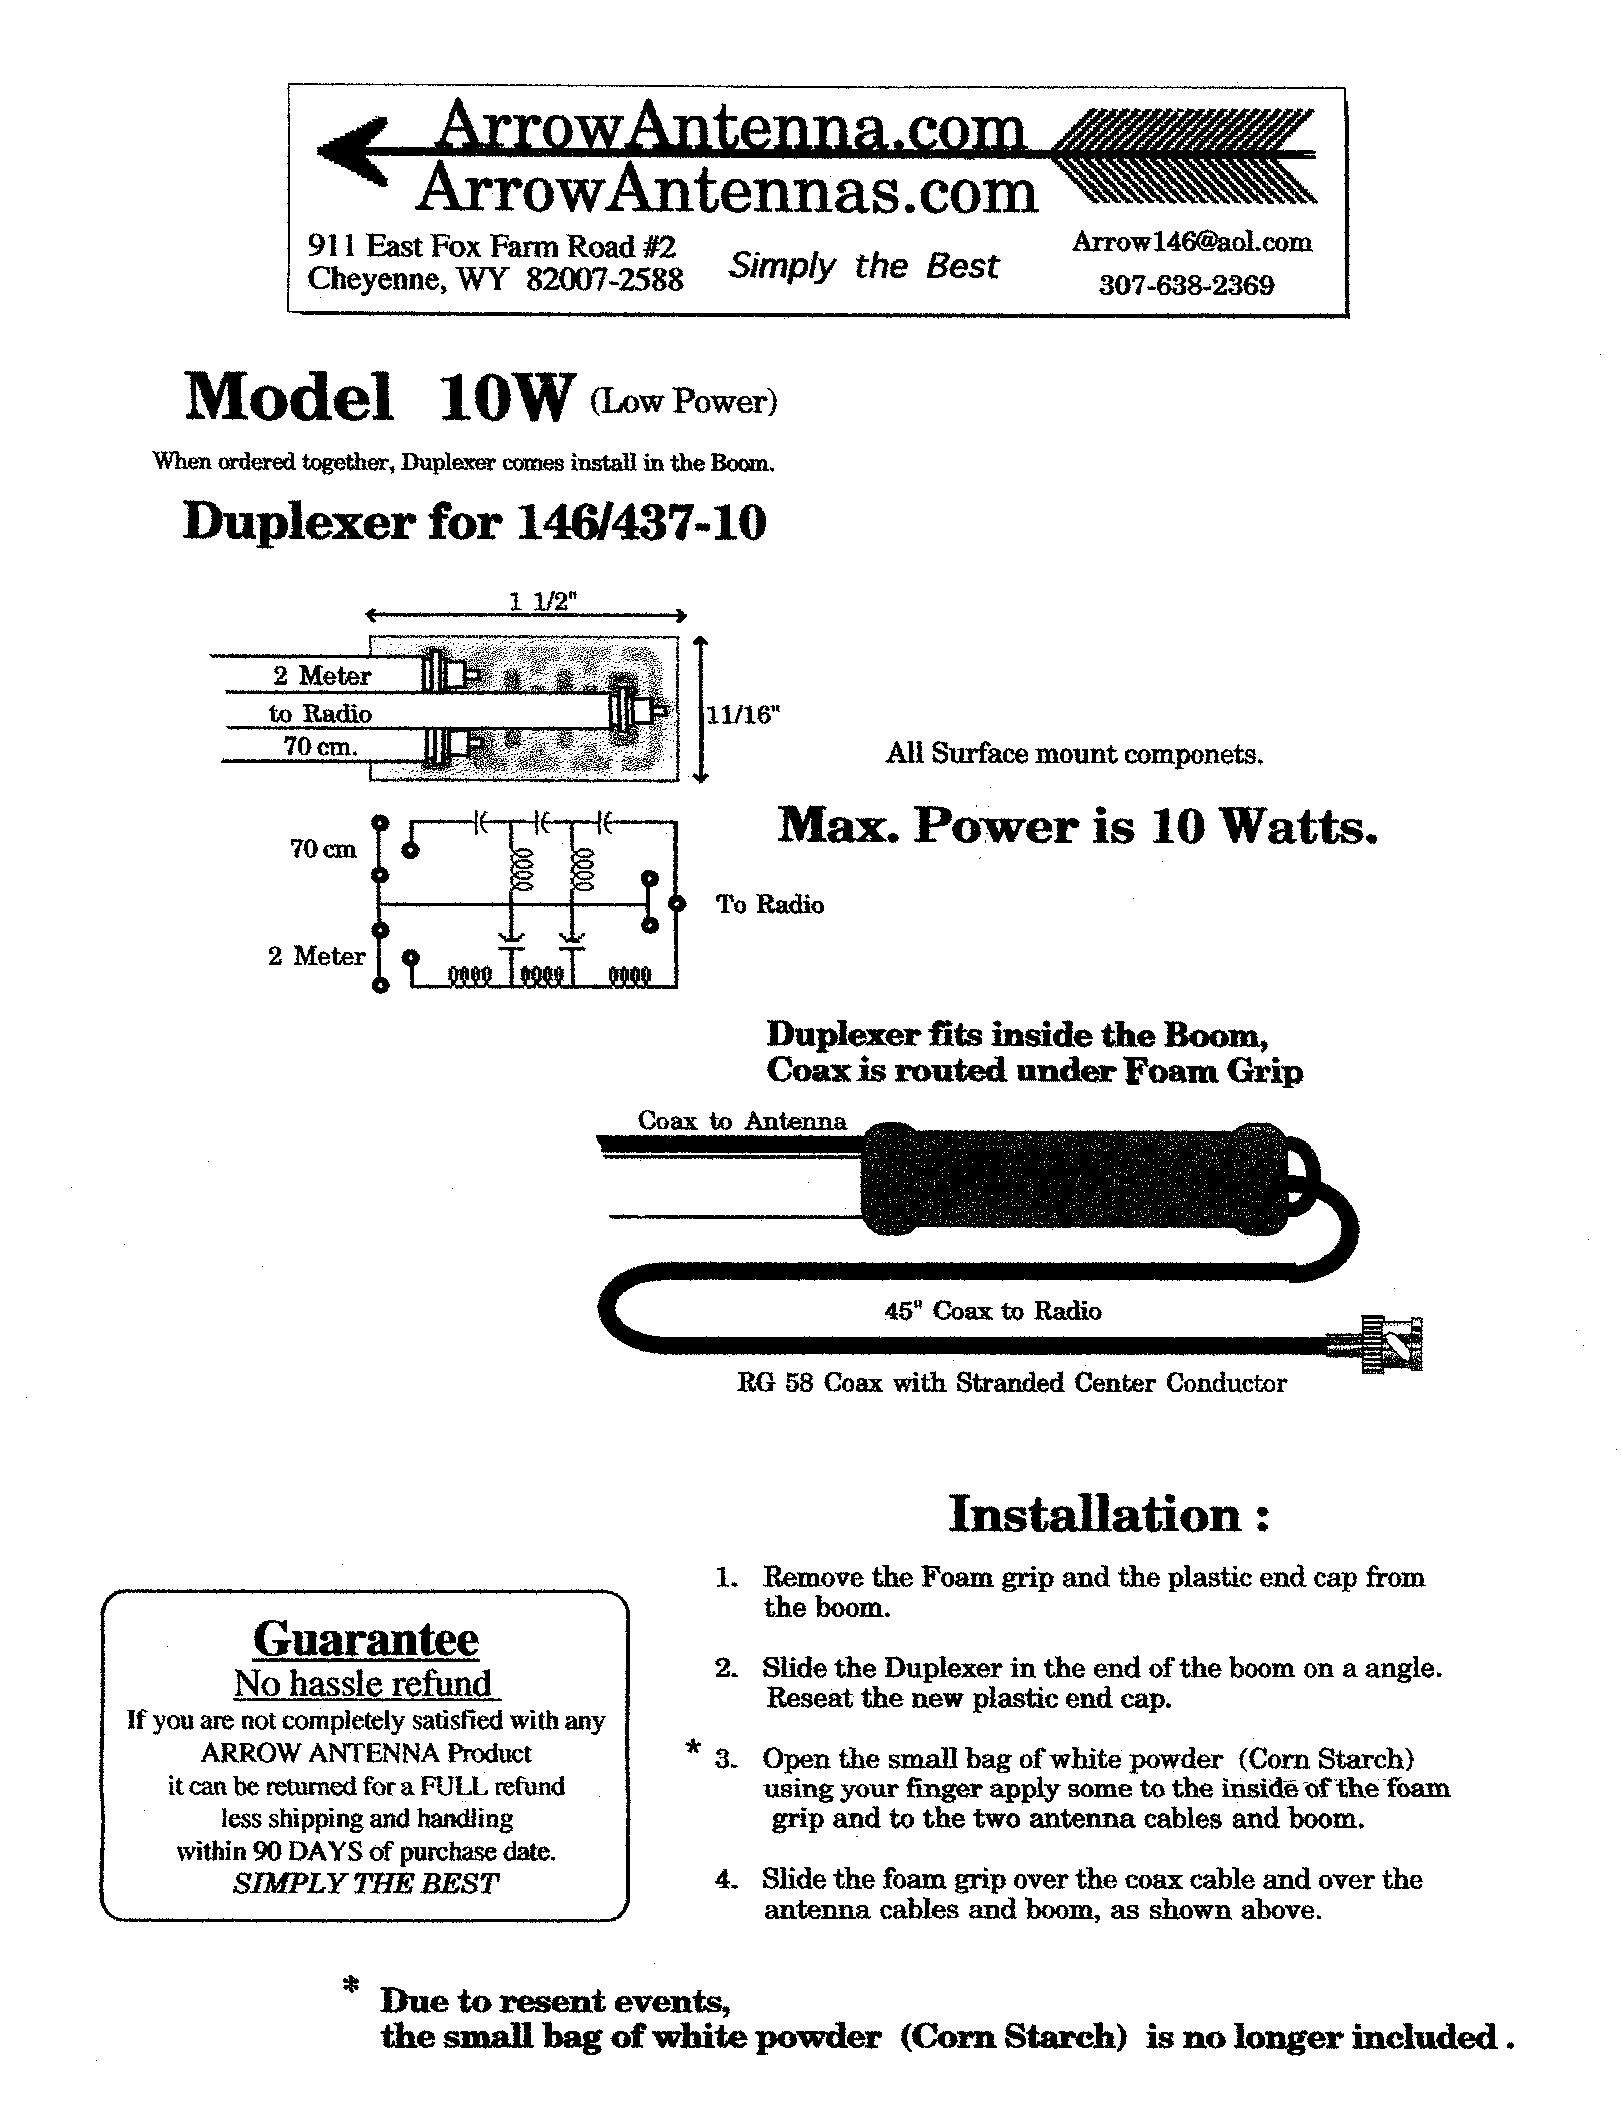
I purchased mine sometime around 2000. Note on the instruction sheet above "* Due to resent [sic] events"... the reference to the first "white dust scare" of the 21st century! Hilarious, in retrospect. But, an example of how times changed permanently as paranoia set in...
Also, the sheet above says "Slide the foam grip over the coax cables [that go from the duplexer to the 70cm and 2m arrays respectively]", but I prefer to let the cables be free in order to get a better grip on the antenna.
Design ©2002-2011, InfoWeb.net Content ©1971-2011 WA2IAC